Table of Contents
Scheduler
The Scheduler is used to setup shifts / breaks for the mill. The Scheduler can be accessed from the Tabs. The DGS uses this schedule to automatically control the clearing of shifts at each machine center. It is important that the schedule that is created here is correct so that the data the DGS collects is correct.
Before continuing, it is extremely important that the schedule is not changed on a currently running shift. This can cause a lot of problems with data collection
Navigating the Scheduler
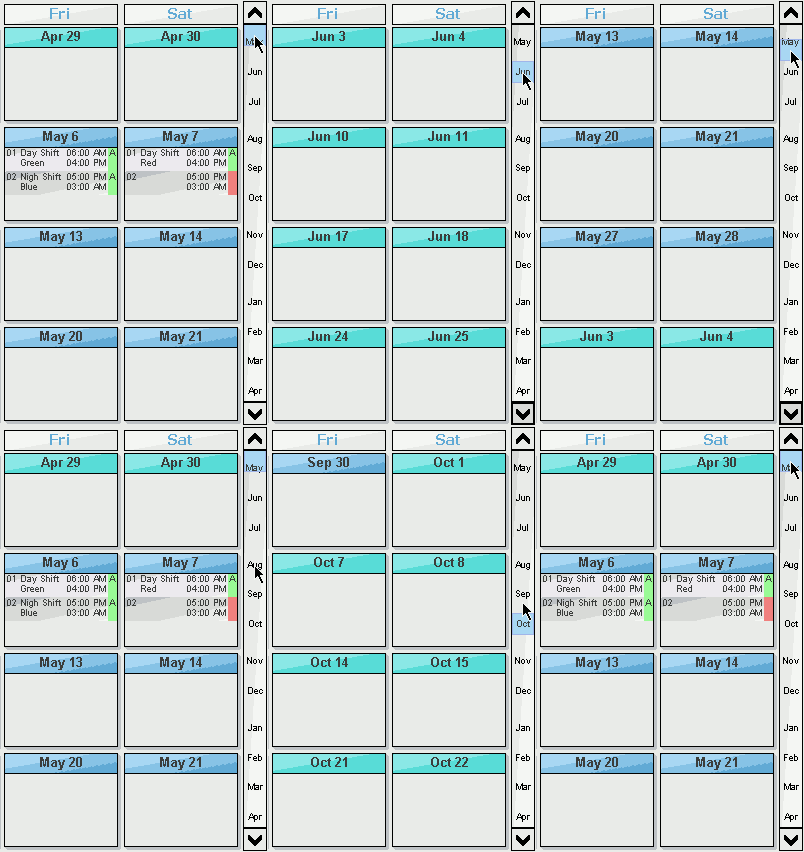 On the right side of the scheduler there is a date slider. you can use this to navigate to a specific date
If you left click anywere on the date slider it will move to that position. if you hold down the left button and move the mouse you can fine tune your location
You can also use the up down buttons on the top and bottom of the scroller to navigate up and down a week
Create a Shift
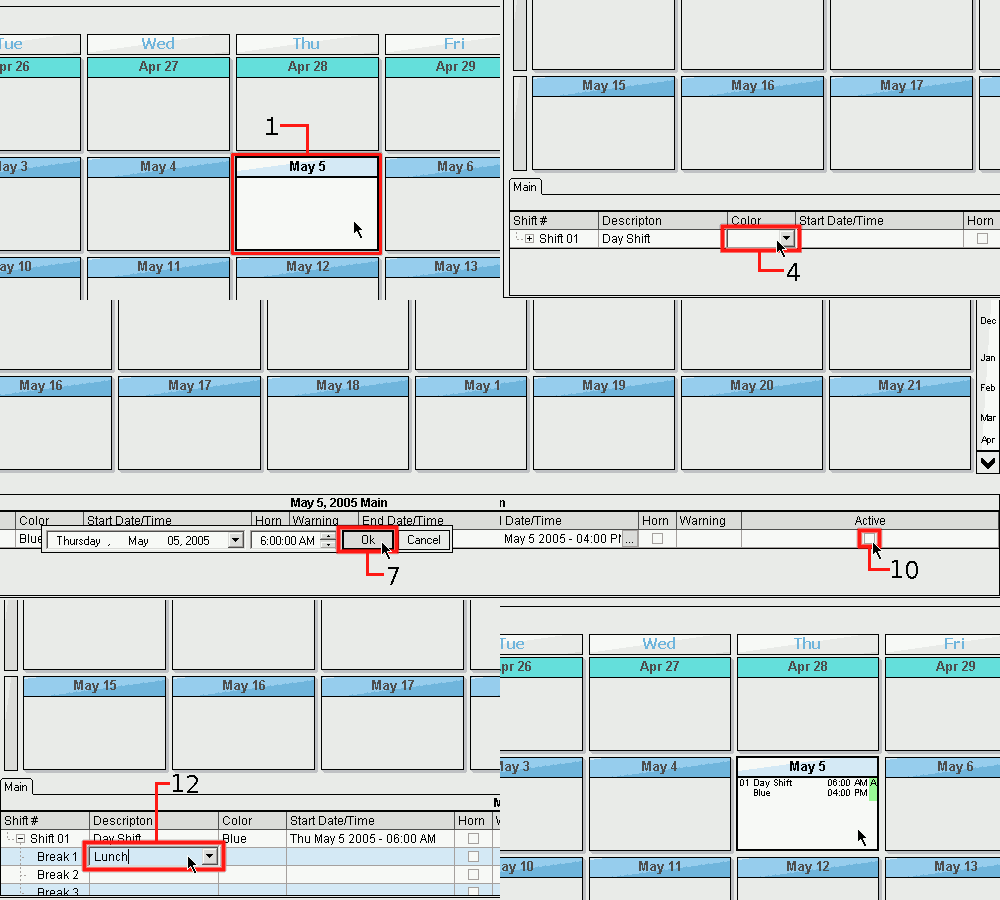
- Select the day that you wish to create the shift on.
- Right Click in the grid on the bottom and select Add Shift.
- Enter in a description for this shift ex. Day Shift, Night Shift.
- Enter in a color for the shift can be used to identify what crew is running. ex. Blue, Red, A, B
- Click on the start Date/Time field a button with “…” will appear.
- Set the day and time of the start of shift.
- Press the OK Button to save the time
- Click on the End Date/Time field then click the button that appeared.
- Set the Date/Time for then end of shift then press OK
- Click the check box in the active field to active the shift
- To Setup the breaks for this shift click on the '+' to expand the breaks
- Fill out a description
- Set the start time same process as shift
- Set the end time same process as shift
- Then active the break by clicking the check box in the active column
Copy Day
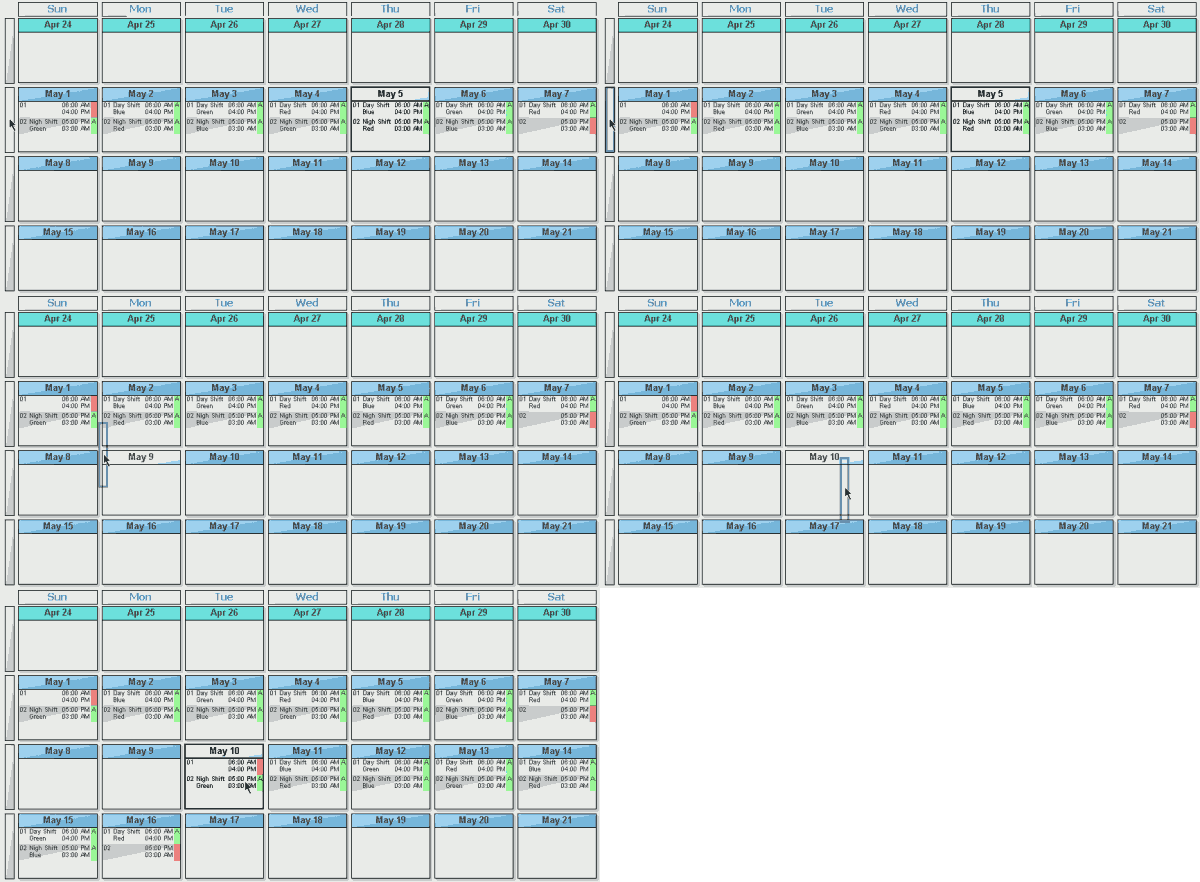
Drag and Drop Day - Press down and hold the left mouse button on the day you want to copy. Move the mouse to the new day holding the left mouse button down. Release the left mouse button.
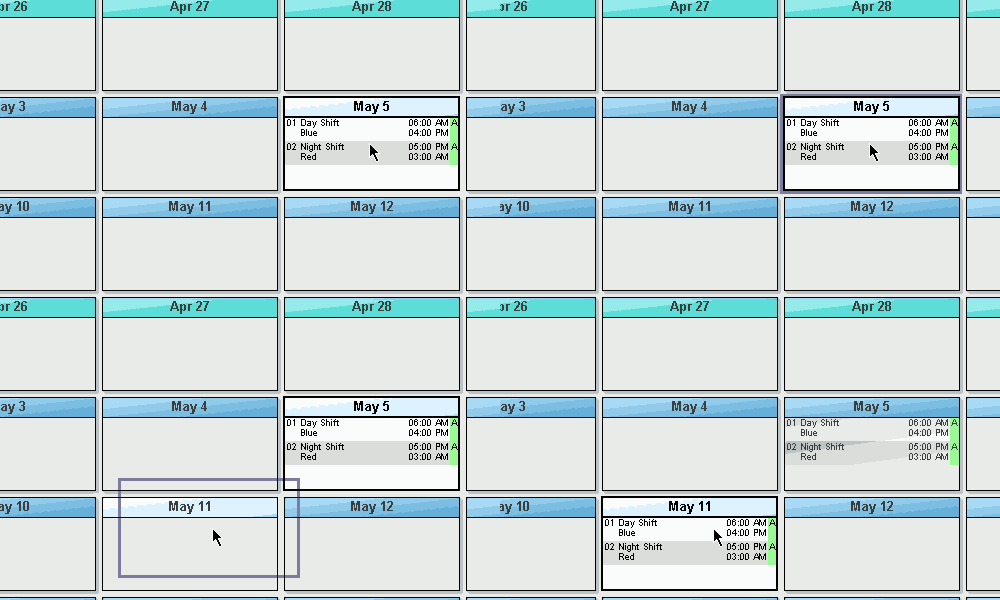
Copy day with menu - Right Click on the day to be copied. Select copy day from the menu. Right Click on day to copy to and select paste Day from the menu.
Copy Week
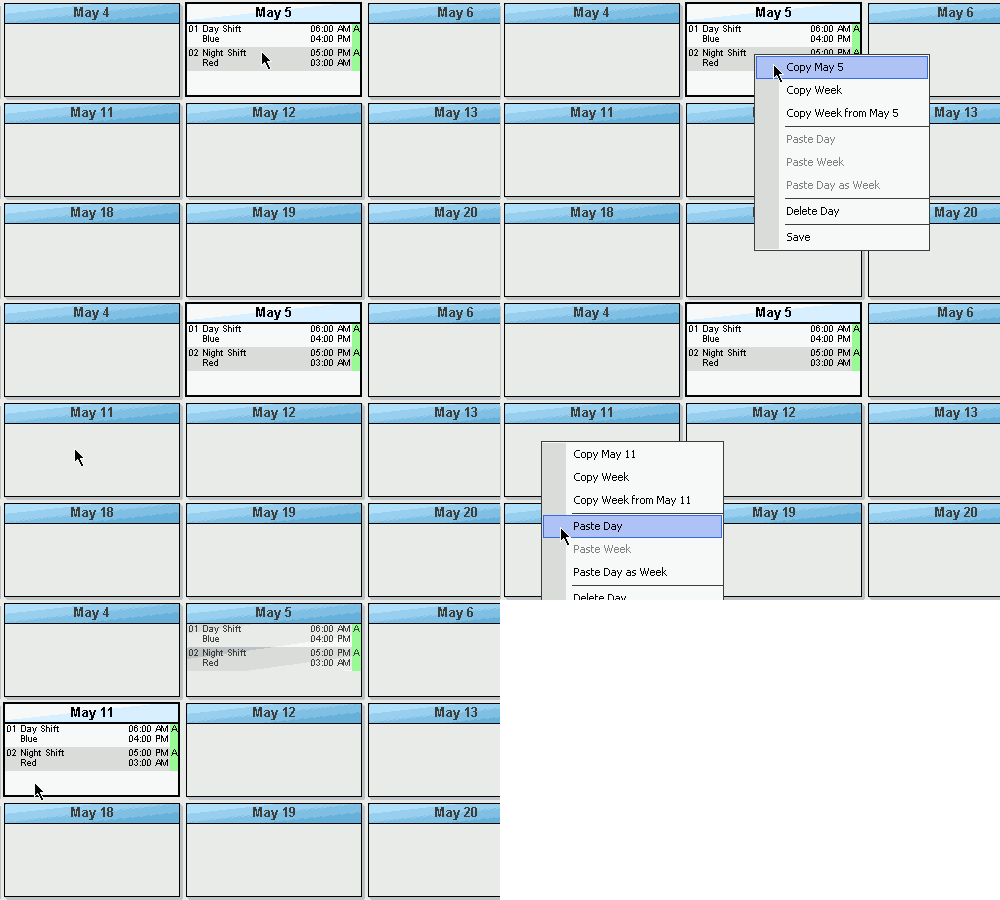
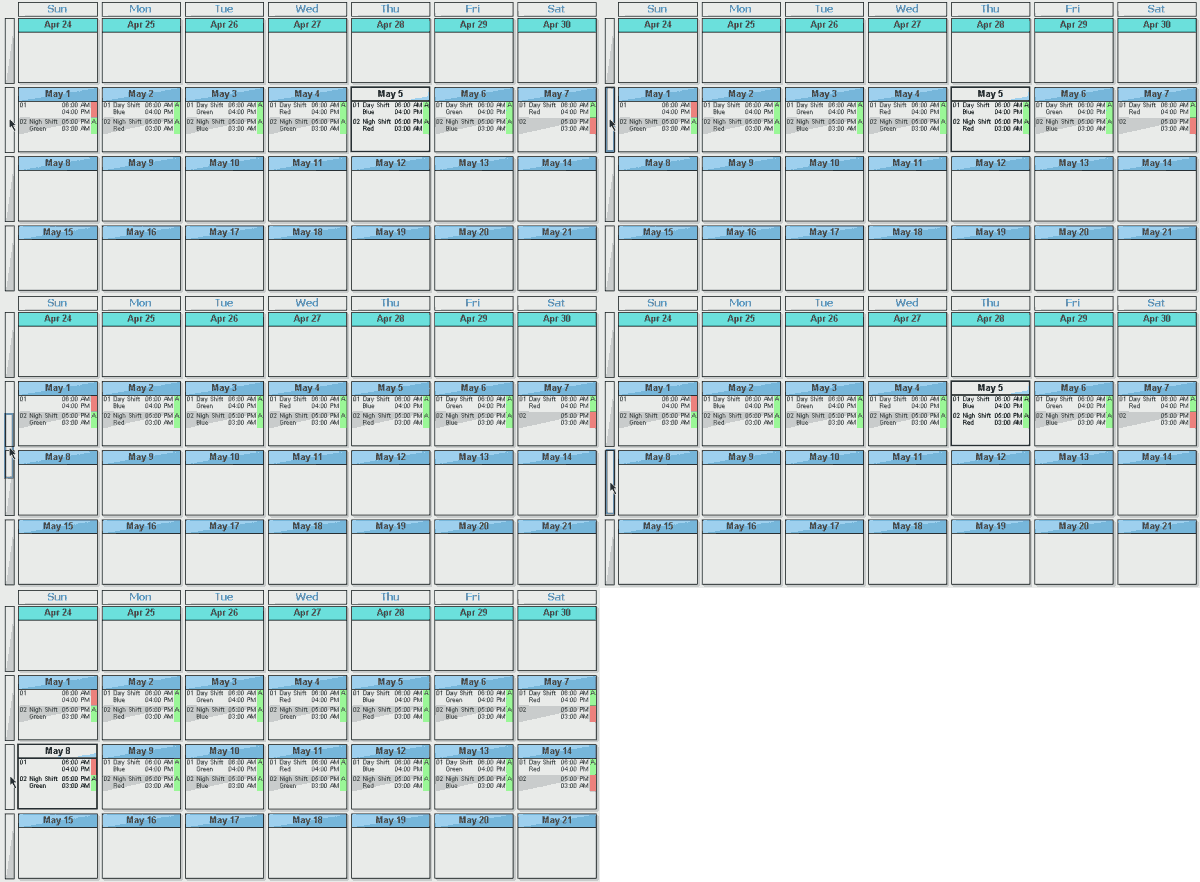
Drag and Drop Week - Press down and hold the left mouse button on the week grip you want to copy. Move the mouse to another week grip or a day holding the left mouse button down then release the left mouse button.
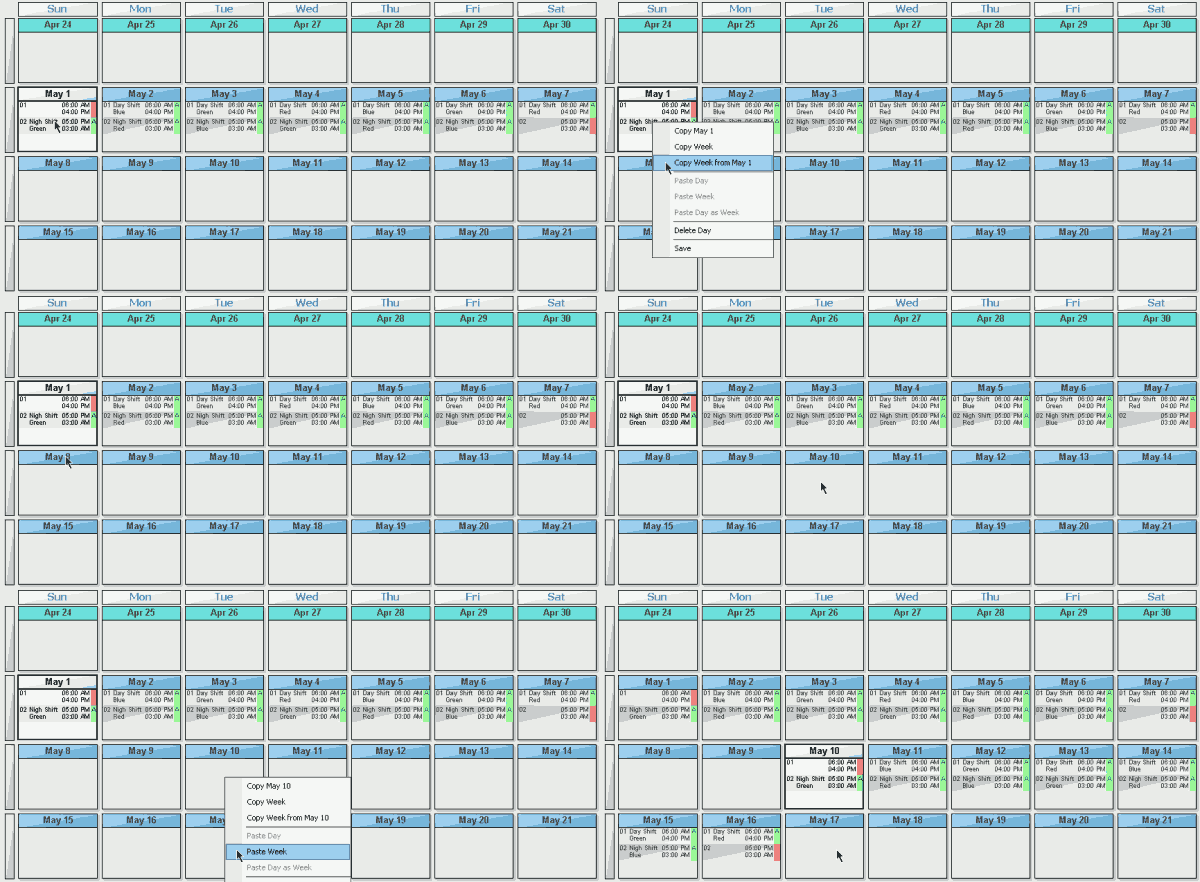
Copy week with menu - Right Click on the first day to be copied. Select copy week from (day) from the menu. Right Click on day to start the week and select paste week from the menu.
Printing a Schedule
To Print the schedule click the print button near the top of the window. When you do this a window will come up with a choice of Styles.
List Style
The list style prints all of the shifts in a selected date range. You can change the date range at the top of the window.
Calendar Style
The Calendar Style prints the shift in to a calendar sheet. It Allows for 3 shifts per day. If there is more you will not see them. On the top right of each day there is a number. This number is the shift number. You can change the the month with the drop down at the top of the window
